Canvas Widget in Tkinter (GUI Programming) – Python Tkinter Tutorial
Canvas Widget in Tkinter Python provides a vast number of libraries for GUI application development. Tkinter is the widely used library for GUI application development. Using the Tkinter library of python which carries large numbers of widgets, we can easily create a Graphical User Interface for our application.
Canvas: The canvas widget in Tkinter is used to draw shapes or graphs in a window. We can draw several things in the canvas i.e. images, lines, arc bitmap, text, rectangles etc. Rectangles can be both outline as well as interior. It can also be used to create graphical editors.
Canvas is a general purpose widget used to make any kind of graphics which includes drawings, charts etc. It has two co-ordinates system X-axis and Y-axis.
Syntax:
canvas = Canvas(root, width, height, options*)
Explanation:
- root: Here root refers to the parent window.
- width: Here we can set the width of our canvas.
- height: Here we can set the height of our canvas.
- options*: It refers to the available parameters we can use with canvas. We will discuss this in examples and projects as well.

Let’s see some example to understand the concept better
from tkinter import *
#setting up parent window
root = Tk()

canvas = Canvas(root, bg="yellow", width=150, height=250)
canvas.pack()
line = canvas.create_line(70,150,140,5)

root.geometry("350x220")
root.title("PythonLobby.com")
root.mainloop()
Output:
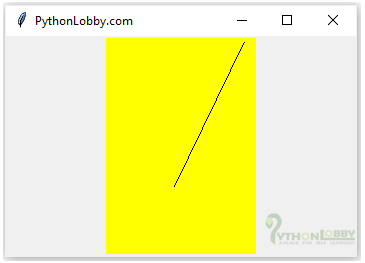

Explanation of program:
- First, we have imported all the required libraries and modules of Tkinter using import *.
- Then we have initialized root as an object for Tk() class for creating a root window.
- Next we initialized canvas object with canvas function.
- Height and width is the necessary parameters for canvas widget.
- Canvas widget provides options to draw/create large number of shapes and graphs i.e. circle, rectangle etc.
- In this example, we drawn the line widget.
- Inside the create_line function the first parameter is the x and y co-ordinates i.e. (x,y,x1,y1).
- Here we are using geometry manager as pack geometry manager.
Example 2: In this example, we will draw 2 lines.
from tkinter import *
#setting up parent window
root = Tk()

canvas = Canvas(root, bg="yellow", width=150, height=250)
canvas.pack()
line = canvas.create_line(30,50,100,5,23,30, width=5, fill="red")

root.geometry("350x220")
root.title("PythonLobby.com")
root.mainloop()
Output:
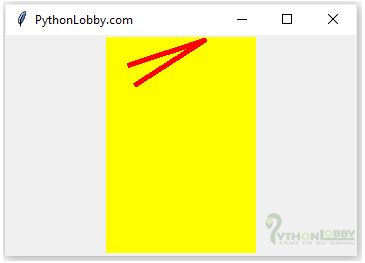
Explanation of program:
- First, we have imported all the required libraries and modules of Tkinter using import *.
- Then we have initialized root as an object for Tk() class for creating a root window.
- Next we initialized canvas object with canvas function.
- Height and width is the necessary parameters for canvas widget.
- Canvas widget provides options to draw/create large number of shapes and graphs i.e. circle, rectangle etc.
- In this example, we have drawn two lines widget.
- Inside the create_line function the first parameter is the x and y co-ordinates i.e. (x,y,x1,y1,x2,y2).
- Here we are using geometry manager as pack geometry manager.

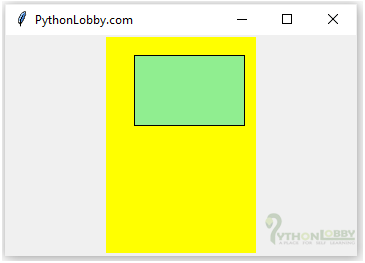
Example 3: In this example, we will draw rectangle.
from tkinter import *
#setting up parent window
root = Tk()

canvas = Canvas(root, bg="yellow", width=150, height=250)
canvas.pack()
rectangle= canvas.create_rectangle(30,20,140,90, fill="light green")
root.geometry("350x220")
root.title("PythonLobby.com")
root.mainloop()
Output:

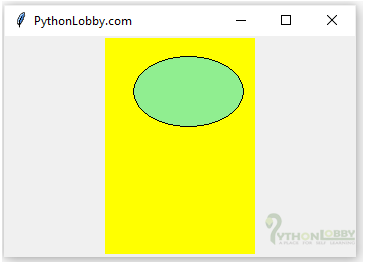
Example 4: In this example, we will draw oval.
from tkinter import *
#setting up parent window
root = Tk()

canvas = Canvas(root, bg="yellow", width=150, height=250)
canvas.pack()
rectangle= canvas.create_oval(30,20,140,90, fill="light green")
root.geometry("350x220")
root.title("PythonLobby.com")
root.mainloop()
Output:
We can draw more widgets using canvas. Please click here to explore more.