Paned Window Widget in Tkinter (GUI Programming) – Python Tkinter Tutorial
Paned Window Widget in Tkinter Python provides a vast number of libraries for GUI application development. Tkinter is the widely used library for GUI application development. Using Tkinter library of python which carries large numbers of widgets, we can easily create a Graphical User Interface for our application.
Paned Window Widget: Paned Window widget is a widget in Tkinter library of python used to integrate or implement multiple windows in a single application window. This paned window can be resized by moving the cursor from right to left or top to bottom depending upon alignment of paned window widget. Paned window widget is nothing but just contain one or more than child widget panes.
![]()
Syntax:
pw = ttk.PanedWindow(master, options)
Parameters:
- master: It represents the root window or parent window object.
- options: It represents the attributes passed directly to the constructor of the class.
Let’s have an example to understand the concept of the paned window.
Example 1: Example of the paned window widget with add function.
from tkinter import *
from tkinter import ttk

root = Tk()
#Paned Window
pw = ttk.PanedWindow(root, orient=HORIZONTAL)
pw.pack(fill=BOTH, expand=True)
frame1 = ttk.Frame(pw, relief=SUNKEN)
frame2 = ttk.Frame(pw, relief=SUNKEN)
pw.add(frame1, weight=1)
pw.add(frame2,weight=3)

root.geometry("400x240")
root.title("PythonLobby.com")
root.mainloop()
Output:


Explanation:
- First, we have imported all the required libraries and modules of Tkinter using import *.
- Then we have initialized root as an object for Tk() class for creating a root window.
- Paned Window widget inherits its property from ttk class, so we used ttk as an object with Paned Window.
- We used fill and expand parameters along with pack geometry manager. Here ‘fill=BOTH‘ means, our paned window will fill to both x-axis and y-axis. And also the ‘expand=True‘ means, when we stretch the size of our main window then our paned window will also adjust its size as per requirement.
- Now we have registered two frames, frame1 and frame2 with paned window ‘pw’ as its parent and used relief property as SUNKEN which means it adds some width to the border of frames.
- Note: Here the important point is that we didn’t use any geometry manager with frames. Because we have to add those frames in the paned window and the geometry manager is already applied to our paned window widget.
- Rest below code is used for configuring the dimensions and title of the application window.
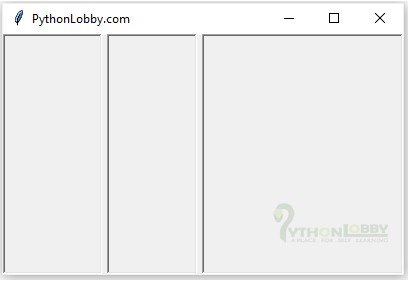
Example 2: Example of the paned window widget without add function.
from tkinter import *
from tkinter import ttk

root = Tk()
#Paned Window with add function
pw = ttk.PanedWindow(root, orient=HORIZONTAL)
pw.pack(fill=BOTH, expand=True)
frame1 = ttk.Frame(pw, relief=SUNKEN)
frame2 = ttk.Frame(pw, relief=SUNKEN)

#with add function
pw.add(frame1, weight=1)
pw.add(frame2,weight=3)

#adding another paned window without add function
frame3 = ttk.Frame(pw, relief=SUNKEN)
pw.insert(1, frame3)

root.geometry("400x240")
root.title("PythonLobby.com")
root.mainloop()
Output:
Explanation:
- First, we have imported all the required libraries and modules of Tkinter using import *.
- Then we have initialized root as an object for Tk() class for creating a root window.
- Paned Window widget inherits its property from ttk class, so we used ttk as an object with Paned Window.
- We used fill and expand parameters along with pack geometry manager. Here ‘fill=BOTH‘ means, our paned window will fill to both x-axis and y-axis. And also the ‘expand=True‘ means, when we stretch the size of our main window then our paned window will also adjust its size as per requirement.
- Now we have registered two frames, frame1 and frame2 with paned window ‘pw’ as its parent and used relief property as SUNKEN which means it adds some width to the border of frames.
- Note: Here the important point is that we didn’t use any geometry manager with frames. Because we have to add those frames in the paned window and the geometry manager is already applied to our paned window widget.
- Rest below code is used for configuring the dimensions and title of the application window.
- We can observe that rest everything is same as we coded above but the only difference is that we used insert function with index 1 and passed frame3 as a child.
This is all about the paned window widget in Tkinter