Labels in Tkinter (GUI Programming) – Python Tkinter Tutorial
In our previous tutorial, We have learnt about how to create our first small GUI Application window. Here in this article we’ll learn about labels.
Labels: The Label is a type of widget which is used to provide a single-line caption. It can be used as a caption for other widgets (buttons, entry etc.) also. It can contain images also.
![]()
Let’s have an example to understand it in better way:
Example 1:
#Labels in Tkinter
from tkinter import *

# creating root window
root = Tk()

# customizing root window title
root.title("Welcome to Python Lobby")
# customizing root window dimension
root.geometry('250x200')

# placing label to our GUI app
lbl = Label(root, text = "We are Python Lobby-ian")
lbl.pack()

root.mainloop()
Output:
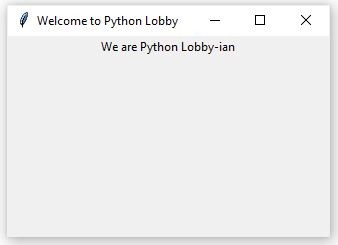
Here we have place our label on our GUI application.
Explanation:
Step 1: We imported tkinter package using “import” keyword.
Step 2: Now we used one variable “root” to create an object to call Tk() function, which is pre-defined in tkinter library responsible for executing code for creating a small GUI window.
Step 3: Here using our object “root” we called the pre-defined title() function and passed the variable as a title name.
Step 4: Here we used our object “root” to call geometry() function to pass the required dimension. All these functions we are using are pre-defined functions in tkinter.
Step 5: We created an object “lbl” and called the label() function and we passed the required arguments. Root & text arguments are must to pass. Here root means that we want to lace our label on root (which is our default GUI window).
Step 6: At last, we will call mainloop() function to finally execute our loop.
Attributes we can use with Labels
| Attributes Name | Description |
| fg | used to give the color to font |
| bg | used to change the background color |
| font | used for external font styling |
| image | we can also use image as label. |
Example 2: In this example we will implement labels along with their attributes.
#Labels in GUI
from tkinter import *
# creating root window
root = Tk()
# customizing root window title
root.title("Welcome to Python Lobby")
# customizing root window dimension
root.geometry('250x200')
# placing label to our GUI app
name = "We are Python Lobby-ian"
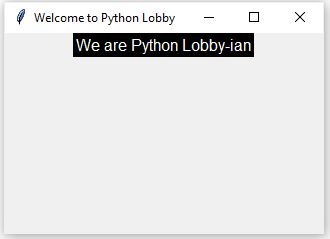
lbl = Label(root, text = name, font=("Helvetica", 12), fg = 'white' , bg='black')
lbl.pack()
root.mainloop()
#
Output:
Explanation:
Step 1: We imported tkinter package using “import” keyword.
Step 2: Now we used one variable “root” to create an object to call Tk() function, which is pre-defined in tkinter library responsible for executing code for creating a small GUI window.
Step 3: Here using our object “root” we called the pre-defined title() function and passed the variable as a title name.
Step 4: Here we used our object “root” to call geometry() function to pass the required dimension. All these functions we are using are pre-defined functions in tkinter.
Step 5: We created an object “lbl” and called the label() function and we passed the required arguments. Root & text arguments are must to pass. Here root means that we want to lace our label on root (which is our default GUI window).
fg = foreground color, it is used to change the text color/label color.
bg = background color, it is used to change the background color of label.
font = this argument is used to give custom font-family and size to our text.
Apart from this, there are many other arguments we can use with our labels. We will implement all those arguments and attributes in our upcoming articles.