ListBox Widget in Tkinter (GUI Programming) – Python Tkinter Tutorial
ListBox Widget in Tkinter Python provides a vast number of libraries for GUI application development. Tkinter is the widely used library for GUI application development. Using Tkinter library of python which carries large numbers of widgets, we can easily create a Graphical User Interface for our application.
ListBox widget: ListBox widget in Tkinter is used to display available options and provides user with option to select one or more based on application requirement.
![]()
Syntax:
# step1 for registering listbox
listbox = Listbox(root, width=45, height=15)
listbox.pack(pady=20)

# step2 for adding list items
listbox.insert(0, "C")
Let’s see some examples to understand the concept better
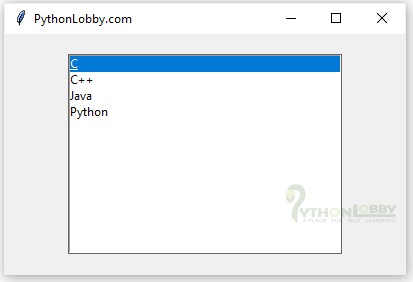
Example 1: Example of listbox widget for single option selection (default).
from tkinter import *
from tkinter import ttk

root = Tk()

# ListBox Widget
listbox = Listbox(root, width=45, height=15)
listbox.pack(pady=20)

#adding widget to Tab
listbox.insert(0, "C")
listbox.insert(1, "C++")
listbox.insert(2, "Java")
listbox.insert(3, "Python")

root.geometry("400x240")
root.title("PythonLobby.com")
root.mainloop()
Output:

 Explanation:
- First, we have imported all the required libraries and modules of Tkinter using import *.
- Then we have initialized root as an object for Tk() class for creating a root window.
- Next we registered the listbox object to create our listbox also we used height and width as parameters.
- In the very next line, we added some options to our listbox using insert method of listbox.
- Rest below code is used for configuring the dimensions and title of the application window.
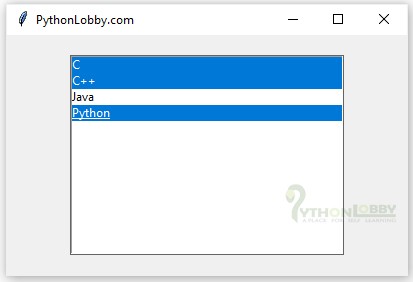
Example 2: Example of listbox widget for multiple option selection (default).
from tkinter import *
from tkinter import ttk

root = Tk()

# ListBox Widget
listbox = Listbox(root, width=45, height=15, selectmode=MULTIPLE)
listbox.pack(pady=20)

#adding widget to Tab
listbox.insert(0, "C")
listbox.insert(1, "C++")
listbox.insert(2, "Java")
listbox.insert(3, "Python")

root.geometry("400x240")
root.title("PythonLobby.com")
root.mainloop()
Output:


Explanation:
- First, we have imported all the required libraries and modules of Tkinter using import *.
- Then we have initialized root as an object for Tk() class for creating a root window.
- Next we registered the listbox object to create our listbox also we used height and width as parameters.
- In the very next line, we added some options to our listbox using insert method of listbox.
- Note: Here new thing is that I have used “selectmode=MULTIPLE” only for multiple selection.
- Rest below code is used for configuring the dimensions and title of the application window.
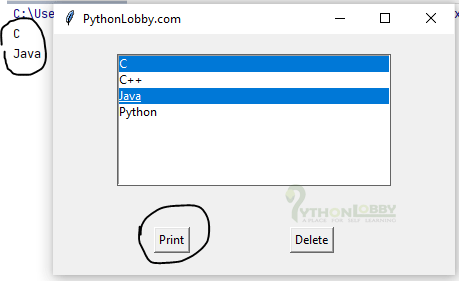
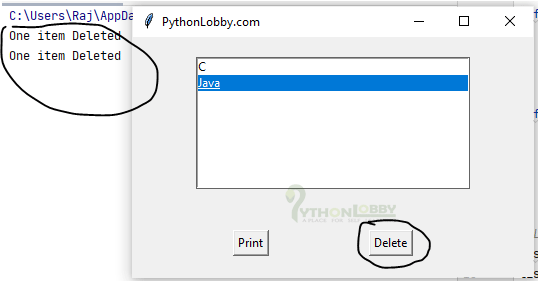
Example 3: Advanced Example
from tkinter import *
from tkinter import ttk

root = Tk()
def printitem():
get = listbox.curselection()
for i in get:
print(listbox.get(i))

def delitem():
deleted = listbox.curselection()
for i in deleted:
listbox.delete(i)
print('One item Deleted')

# ListBox Widget
listbox = Listbox(root, width=45, height=8, selectmode=MULTIPLE)
listbox.pack(pady=20)

#adding widget to Tab
listbox.insert(0, "C")
listbox.insert(1, "C++")
listbox.insert(2, "Java")
listbox.insert(3, "Python")
btn = Button(root, text="Print", command=printitem).pack(side=LEFT, padx=100)
btn2 = Button(root, text="Delete", command=delitem).pack(side=LEFT)

root.geometry("400x240")
root.title("PythonLobby.com")
root.mainloop()
Output: When clicked on print button

Output: When clicked on delete button

Explanation:
- We will discuss this type of problems in our projects.